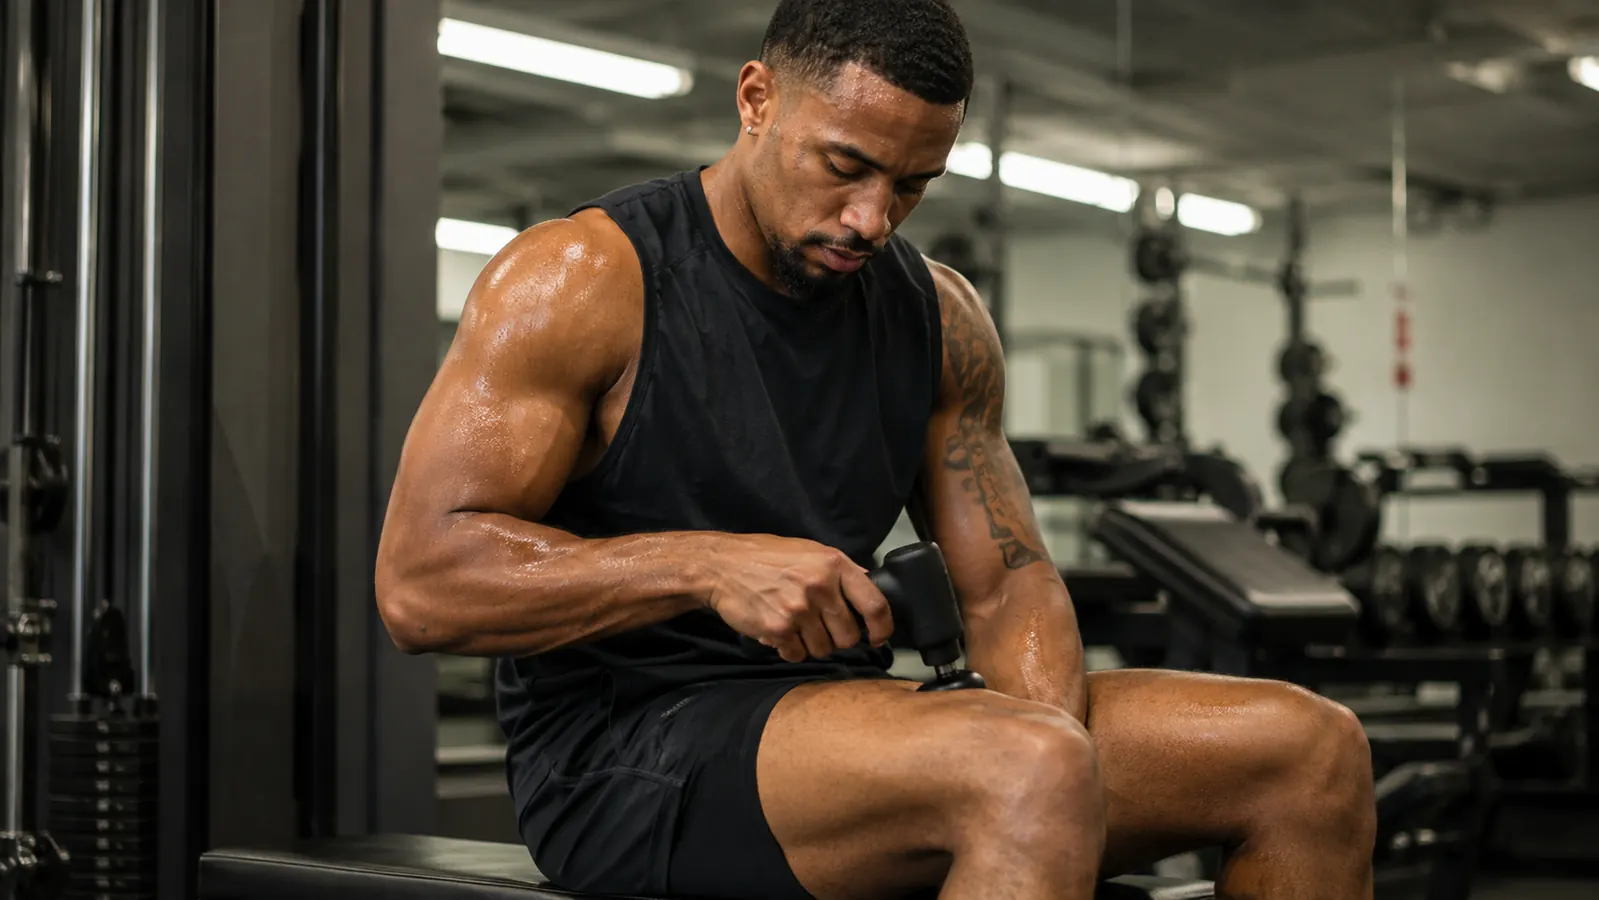
Most people who buy a massage gun use it the same way: press it hard against whatever hurts, hold it there, wince a little, repeat. That approach gets you some relief, but it misses most of the value. Percussion massage works through a combination of increased blood flow, fascial loosening, and nervous system downregulation. Those three things happen at different depths and in different windows after training. If you are just jamming a gun into a sore spot, you are skipping two of the three. This guide walks you through a complete post-workout protocol so you get the actual benefit.
I put together this protocol after six months of daily use with the TOLOCO Massage Gun following my own lifting sessions. My training schedule runs five days a week: three upper body days and two lower body days, with sessions ranging from 45 minutes to 90 minutes. Before I dialed in my approach, I was still stiff the next morning even on days I used the gun. The difference was almost entirely technique and timing, not the tool itself.
If you do not own a percussion massager yet, this is the one I use daily
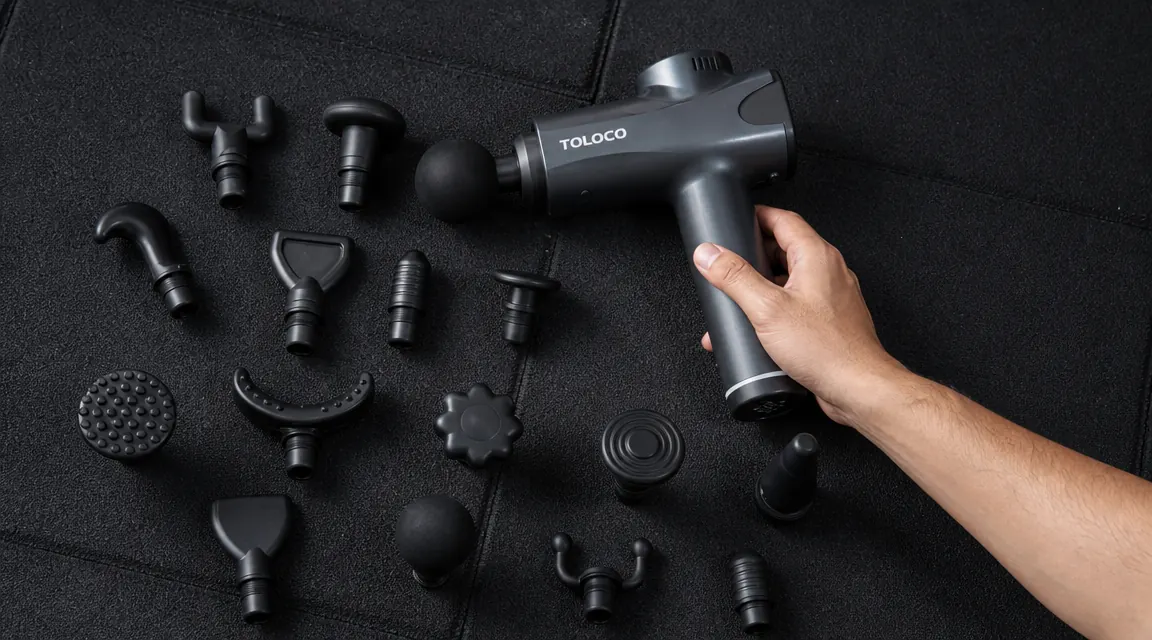
The TOLOCO Massage Gun comes with 15 interchangeable heads, a quiet motor that will not disturb anyone nearby, and battery life that lasts through a full week of daily sessions. At current pricing it is one of the best values in recovery gear.
Amazon Check Today's Price on Amazon →The Right Time Window: When to Use the Massage Gun After Training
Timing matters more than most guides admit. The conventional advice is to wait at least 10 minutes after your last working set before starting percussion massage. That is not arbitrary. During and immediately after intense exercise, your muscles are in an acute inflammatory state. Percussing a muscle that is still in that window can actually amplify soreness the next day rather than reduce it. Ten minutes of light walking or passive cooling is enough to shift your body out of that acute phase.
The ideal window is 10 to 45 minutes post-workout. Within that range, your muscle temperature is still elevated (which improves fascial pliability), your nervous system is transitioning from sympathetic to parasympathetic, and blood is still cycling through the worked tissue at higher-than-resting volume. All three factors make percussion massage significantly more effective than it would be two hours later on a cold, tight muscle. That said, using a massage gun the evening after a morning workout is still worthwhile. You just lose some of the window advantage.
Step 1: Choose the Right Head Attachment for Each Muscle Group
The flat round head is your default for large muscle groups: quads, hamstrings, glutes, and upper back. It disperses percussion across a wide surface area and is forgiving if your angle drifts. Start here if you are unsure what to use. The bullet head is for deeper work on a specific trigger point or the belly of a smaller muscle like the piriformis or the lower calf. It concentrates force into a tight area, so use it with lighter pressure and shorter dwell time.
The fork head is designed for the spine and Achilles tendon area, where you want percussion on the tissue beside a bony structure rather than directly on it. The U-shaped channel lets you straddle the spine while hitting the erectors on both sides. The soft ball head is for sensitive areas like the IT band, where the firmer heads can cause bruising if you stay too long. Most people using the TOLOCO get by on four heads for 90 percent of their sessions: flat, bullet, fork, and soft ball. The remaining 11 heads are specialty tools for specific situations.
Step 2: Set the Speed Before You Touch the Muscle
Do not start with high speed. This is the most common mistake I see at the gym. High speed (on the TOLOCO, that is the 4 or 5 range, up to 3200 RPM) is appropriate for breaking down stubborn scar tissue or working through a muscle that has recovered and tightened up, not for immediate post-workout use. Start every session on speed 2 or 3. This produces enough percussion to drive blood flow and begin fascial work without overloading a fatigued muscle.
After two to three minutes on a muscle group, you can assess whether you want to increase. If the muscle is responding (you can feel it softening under the head), stay where you are. If it feels like you are bouncing off a rubber tire, step up one speed increment. Only go to the highest setting if you have a specific dense area and you are well past the acute post-workout window.
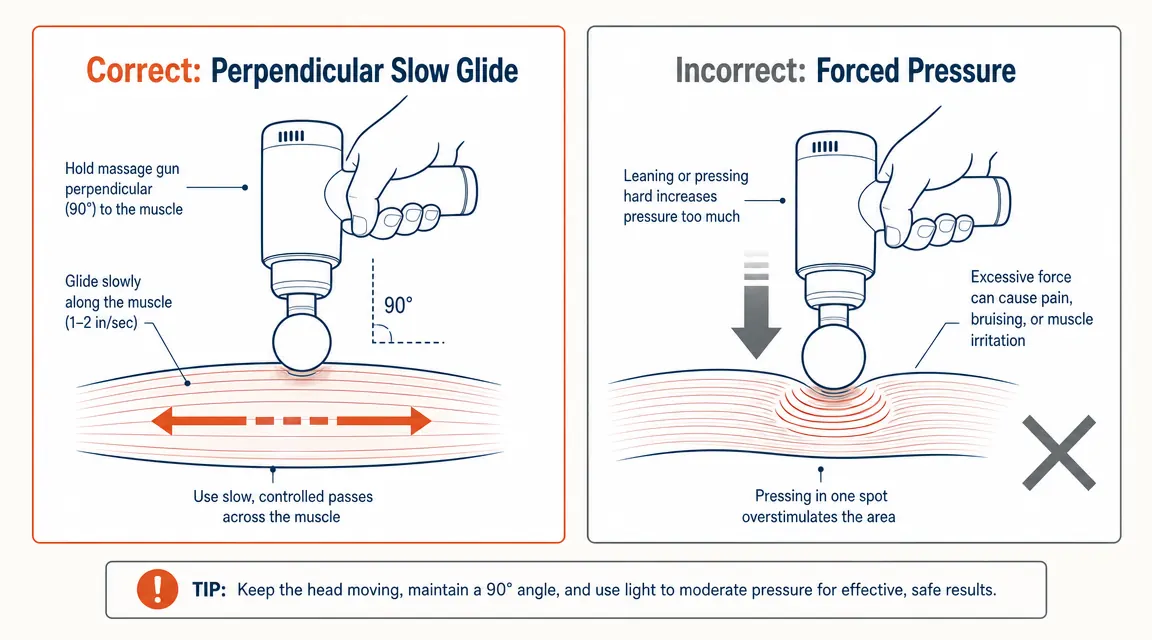
The mistake most people make is using too much pressure and too little movement. The gun does the work. Your job is to move it slowly and let the percussion penetrate.
Step 3: Work Each Muscle Group in Order, Largest to Smallest
On lower body days, I run this sequence: glutes, quads, hamstrings, calves. On upper body days: upper back and traps, lats, chest, triceps, biceps. The logic behind largest-to-smallest is that larger muscle groups take longer to warm up and respond, so starting there gives them the full benefit window. By the time you reach the smaller accessory muscles, they have also had time to settle from their acute state.
Spend 60 to 90 seconds per muscle group on days where you worked that group directly. Spend 30 seconds on muscles that were only secondary movers. For example, on a squat-heavy leg day, the quads and glutes get 90 seconds each. The calves, which stabilized but did not do primary work, get 30 to 45 seconds. This keeps your total session under 10 minutes and prevents you from overdoing any single area.
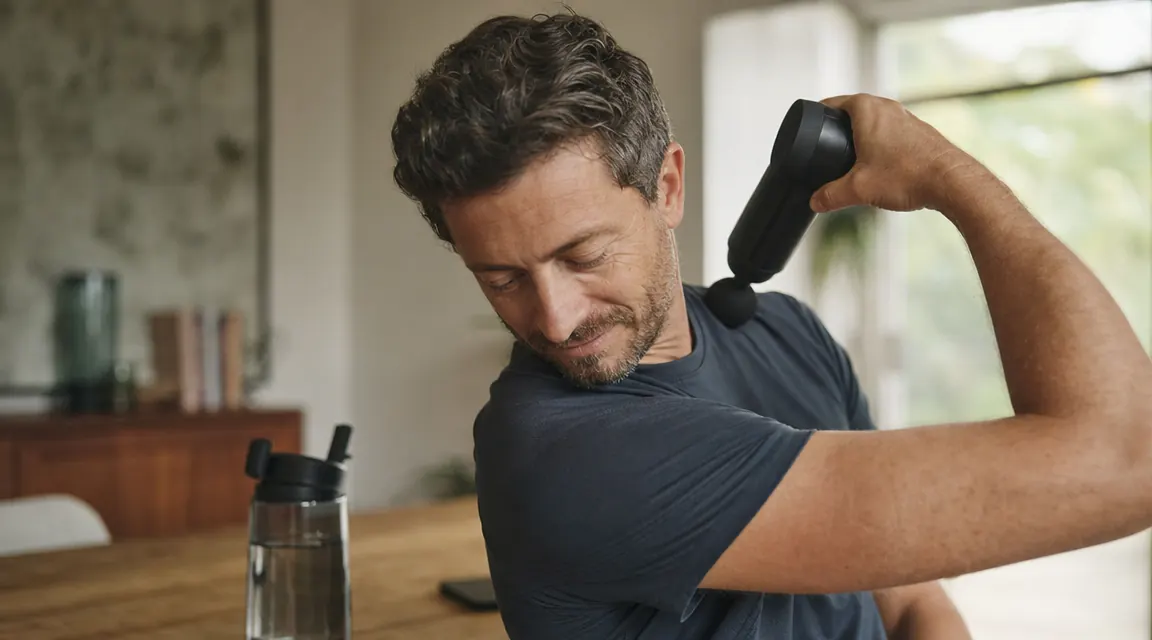
Step 4: Keep the Head Moving Slowly Along the Muscle Belly
Stationary percussion is less effective than slow gliding. The way percussion massage works, it creates a wave of pressure that travels into the tissue and back up. When the head is moving, that wave reaches new fibers with each stroke. When the head is stationary, the same fibers absorb repeated impact until they adapt to the signal. You lose penetration depth and the window of neurological effect shortens.
Move the head at roughly one inch per second. On a long muscle like the quad, that means a full sweep from just above the knee to just below the hip takes about eight seconds. Do three to five sweeps per pass, then move laterally half an inch to cover the width of the muscle. Keep the head perpendicular to the muscle surface, not angled. Angled contact reduces percussion depth and increases the chance of glancing off bone.
Step 5: Avoid These Zones , Joints, Bony Landmarks, and the Spine Itself
Percussion massage is for muscle belly and connective tissue only. There are several areas you must avoid regardless of how sore they feel. Do not run the massage gun directly over your kneecap, hip bone, elbow joint, ankle joint, or any bony prominence. The percussion force that is therapeutic in soft tissue becomes bruising and damaging on bone. Work around these landmarks, not over them.
Do not run any attachment directly down your spine. The fork head is designed to work beside the spine, not on it. The vertebrae themselves are not targets for percussion massage. Similarly, avoid the front of the neck, the side of the neck where the carotid artery runs, the back of the knee (popliteal fossa), the inner upper thigh (femoral artery), and the lower abdomen. These are areas where major nerves and blood vessels run close to the surface. Even experienced users should not percussion these zones.
What Else Helps: Pairing Massage Gun Work With Other Recovery Tools
Percussion massage is most effective when it is part of a layered recovery approach. After your massage gun session, drink 16 to 24 oz of water. Percussion increases lymphatic drainage and that process requires hydration to complete. A cold shower or contrast shower (alternating 90 seconds cold, 60 seconds warm, repeat three times) taken within 30 minutes of your session will extend the anti-inflammatory benefit. Magnesium glycinate taken before sleep on training days also meaningfully reduces delayed onset muscle soreness. These are not complications, they are multipliers that let your massage gun work does more.
Foam rolling and percussion massage address different layers of tissue. Foam rolling compresses fascia from the outside in over a long surface. Percussion massage works perpendicular to the muscle fiber with high-frequency impact. They are complementary, not redundant. If you have both available, do three minutes of foam rolling on the primary muscle groups first, then follow with the massage gun protocol above. The foam rolling softens the outer fascial layer and lets the percussion penetrate more easily. For more detail on the science behind why percussion speeds recovery, the related guide on 10 reasons percussion massage speeds muscle recovery covers the research in depth.
Troubleshooting: When the Massage Gun Does Not Seem to Be Helping
If you have been using a massage gun for two weeks and you are not noticing a difference in next-day soreness, there are three likely culprits. First, check your timing. If you are using it more than an hour after training or on a cold muscle, you are outside the optimal window. Second, check your pressure. Most people press too hard, which causes the percussor head to stall and limits its penetration. The gun should feel like it is floating on the muscle with light contact pressure. Third, check your hydration. A muscle that is chronically under-hydrated does not recover well regardless of what recovery tools you apply. Aim for half your body weight in ounces of water per day on training days.
If you are experiencing sharp or radiating pain when you use the massage gun on a particular area, stop. That is not soreness , that is a signal the tissue has something structural going on that percussion cannot fix. A pulled muscle, nerve impingement, or stress reaction in bone all present as sharp pain under percussion load. See a sports medicine physician before continuing percussion work on that area. The TOLOCO has worked reliably for my recovery for months, but it is not a substitute for diagnosing acute injury. You can read my full experience in the TOLOCO massage gun long-term review if you want more context on how I use it.
The TOLOCO is what I use to run this exact protocol after every session
62,000 reviews, 15 head attachments, a genuinely quiet motor, and enough battery life for a full week of daily use without recharging. If you are building a post-workout routine, this is the tool that makes the protocol above easy to stick with.
Amazon Check Today's Price on Amazon →